Monday, May 12, 2008

Planting the Trees


The Plan
Originally uploaded by Jesse and Tanya
The compost is still quiet warm, and loosing value as a blog topic so we will change things up a bit....

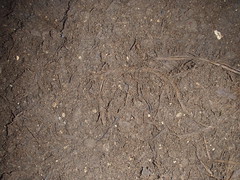
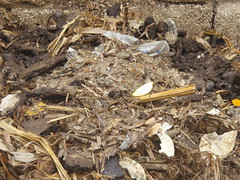
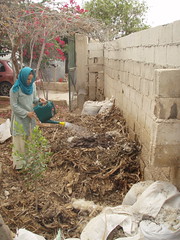
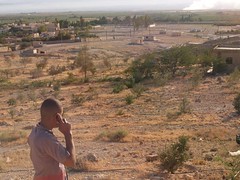
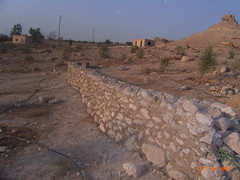
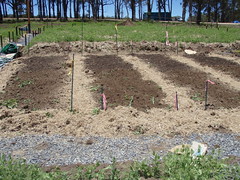
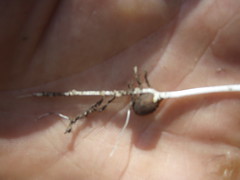
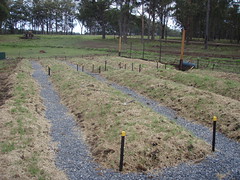
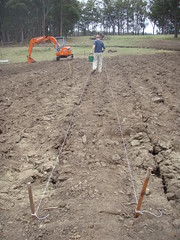
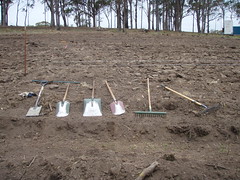
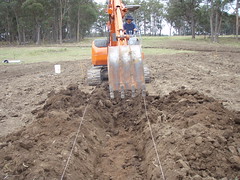
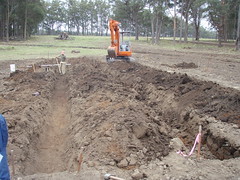
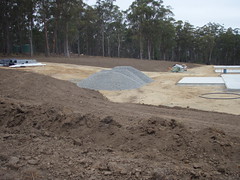
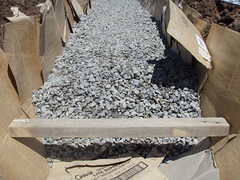
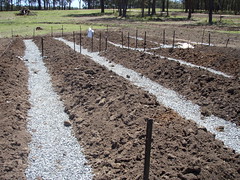
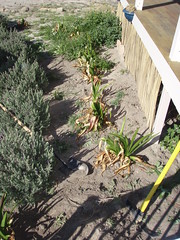
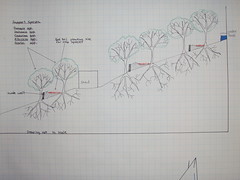
About two weeks ago, we finished the planting of the first trees for Permaculture Research Institute Jordan Valley.  We dug 87 holes about .5m deep, 1m wide and 3m apart above and below the three rock walls.  A few of the trees are closer that 3m, because of large rocks that would often get in the way during digging.  It took just over one week to get all the holes finished.  During this time things really started to heat up down here in the Jordan valley. Work was confined to the morning and evening.  The site is on a very degraded piece of land and the soil is hard and compact with almost no organic matter.  Digging the holes was hard work, and we often found ourselves using a pick axe to chop through a calcified layer of soil. This calcified layer of soil is commonly known as a concretion. When planting trees in such conditions it is very important to get through this layer, as the trees have difficult time pushing roots through on their own.


Tree Planting
Originally uploaded by Jesse and Tanya
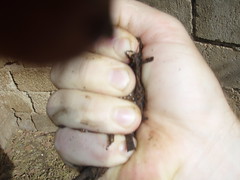
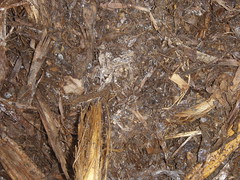
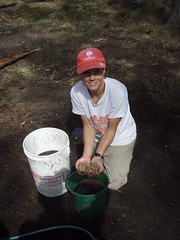
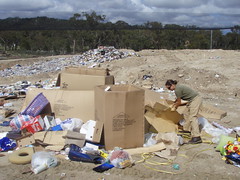
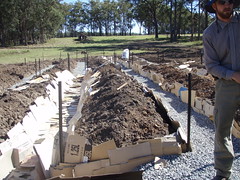
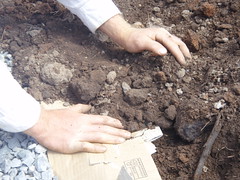
In preparing for the planting of trees we lined the holes with a thick layer of cardboard and  bucketed water into each hole back filling with a mixture of soil and mulch. It is important that the mulch:soil in the be high, as the mulch will increase the water holding capacity of the planting hole. The mulch will also work like compost to increase the soil biology. This new soil biology we help the young trees to grow and thrive.
The cardboard in the hole also works to hold water and act as a fungal food. Many types of fungi are important to the growth and healthy development of young trees.

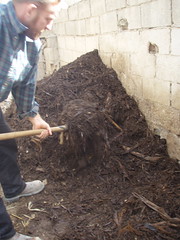
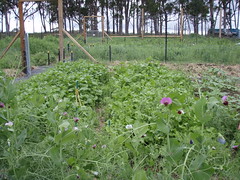
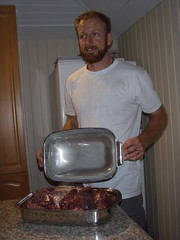
Once we planted a tree a thick layer of mulch was piled around it.  The whole planting process was very labour intensive.  We often put more that 40 minutes into the planting of each tree, and this is still not taking into account all of the hours spent getting materials together.  It is a massive investment of time and energy into just a few trees. However, the shade that these trees will offer in five years will more than amortize our efforts. 

T


Mulch
Originally uploaded by Jesse and Tanya
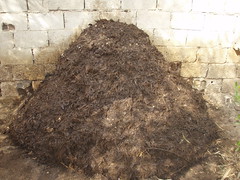
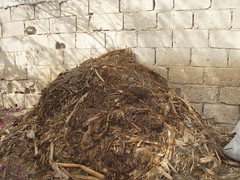
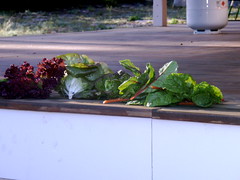
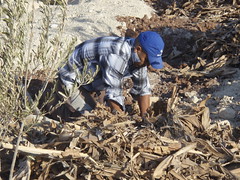
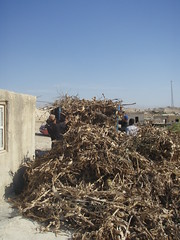
As a matter of common sense, one wouldn't expect that banana leaves be a major source of mulch in one of the driest countries on the planet. However, At great expense to the local environment and population, banana farming is an important part of the local economy. Usually the surplus organic matter from the farms is seen as a problem and often gets burned. In this case we have managed to put the banana leaves to good use, as they provided the bulk of our mulch material for planting the trees. We had some help collecting the mulch from a few friends we have made locally, it turned out to be a fun couple of afternoons.

Mulch can reduce water demand to one fifth what it might be without mulch. It also keeps the root zone of the plants cool and provides habitat for all kinds of beneficial organisms.

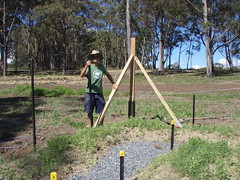
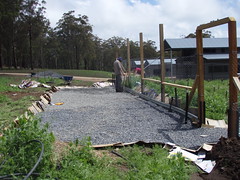
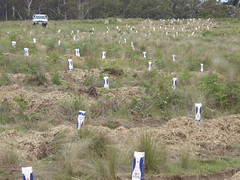
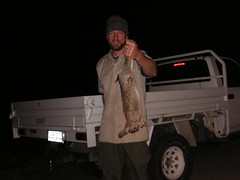
Under very difficult circumstances, we have only lost about 20% of the trees we planted. The weather is getting very hot and dry and we where about 2 months behind on the planting season. We planted only hardy pioneer trees and, all that are still alive, shouldn't have much trouble getting establish. For the moment we are hand watering once every week, and the moisture seems to be holding. Before we leave, next month, it is important that a drip irrigation system be installed so the plantings can be easily water by one person. The really challenge to the survival of these trees will be goats. At the moment the site is not entirely secure and small goats seem to come and go as they please. While on the site, the goats provided us with unnecessary pruning services. Unfortunately the project does not yet have any real budget and it cannot afford to build a new fence or wall. All we can do is patch up holes and hope for the best.

Nothing is easy 400m below sea level!!!

Thursday, May 8, 2008

The compost at 26 days


The compost at 26 days
Originally uploaded by Jesse and Tanya
We have been turning the pile religiously for the last 11 days. Everyday the pile was steaming, and looking as though it would never cool down. Today it happened, no steam and a lower temperature. The pile is evolving out of the thermophilic stage and into the curing stage. We will still turn it, as it is a bit warm and will still be consuming its fair share of oxygen. The product is looking great with a nice dark brown colour, good diverse structure and a clean smell. We have already started to use some small amounts in the garden to help establish new seedlings and germinate seeds. The pile will only get better with age now.

Based on how things went the, C:N ratio was a bit low in this pile. If it was higher the thermophilic stage may have ended sooner. If we had not turned the pile every day would have been anaerobic with a poor end product. We will let you know when it is well and truly cold and curing.
that's all for now.

Sunday, April 27, 2008

Look at this beautiful Pile!


15 day old compost
Originally uploaded by Jesse and Tanya
15 days and still going strong. The shape of this pile is just about ideal. When we turn a pile we try and build the new pile it a nice uniform conical shape. In our experience this shape seems to get the best results. It has also been shown that this shape allows for better oxygenation of the pile. We have found that a lower rounder shape produces more heat and is more likely to turn anaerobic.
Like all aspects of assembling and producing compost achieving an nice shape takes practice, luckily one gets to practice on every turn. We are meticulous about every aspect of making compost. Some days it can take more than 30 mins to turn the pile because we are being very careful to mix and aerate the with each pitch fork and trying to build a nice shape.

Q an A
Some question sent to us via e-mail.

How long can something compost for and produce heat days, weeks or forever if you kept feeding it?

Our pile is still producing a lot of heat. We try to keep the temperate low by turning it every day. If it gets too hot many of the beneficial microbes will be killed off. We expect that it will be starting to cool off in the next few days. It is possible to keep a producing heat by adding more material. Brush turkeys in Australia us a compost heap as a nest. The male bird maintains a constant 30 degree temperature by adding an removing material through the whole incubation period.

Does the composting produce harmful gases?

Most of the gas that is produced by a compost pile is CO2. The C:N of the pile at the start should be about 30:1 by the end of the process it will be something like 10:1. the reduction in C is gassed off as CO2. It is also possible for a pile that has too much N that ammonia be gassed off the pile. We have also noticed a rotten egg smell around composts that are anaerobic, this is likely from a sulphur gas of some kind.

The smells from a compost are excellent patterns to use when working with your pile. One can learn a lot by smelling the pile. If a problem is noticed early enough a pile can be pushed in the right direction.
In order to experience these patterns you have got to turn your pile!!!!

Thursday, April 24, 2008

Compost moisture


compost moisture
Originally uploaded by tlbaraka
And the compost marches on. Actually the compost marches back and forth with each turn. It has been developing for about 12 days now and some big changes have taken place. For one it is getting easy to turn as the big banana leaves have broken down into smaller pieces and are no longer getting caught together. We only saw the wool twice on this mornings turn( we put a whole sheep's worth of wool into the pile). The material has a nice dark brown colour to it, not black. Black would indicate an anaerobic compost. There is no offensive smell. The pile seems to be maintaining its initial volume. Often when a pile is too hot it will shrink in size. In all compost piles bulk carbon is gassed off, however, this lost volume can be replaced by air space and structure if the pile is well turned and oxygenated.

Today we also performed a quick check to ensure proper moisture content.
1. Take a handful of compost.
2. Squeeze as hard as you can.

If water drips out of the compost and off of your hand the pile is too wet.
If no water appears the pile is too dry.
If water just appears, but does not drip, between your fingers and on the surface of the compost the moisture content is just right.

Notice in the picture the moisture between the pinky and ring fingers and below the tip of the middle finger. This pile seems to have just the right amount of moisture content.

In the next post we cover pile shape and its effects on the composting process.

Monday, April 21, 2008

Turning the pile on day eight


turning the pile on day eight
Originally uploaded by tlbaraka
Ok so the pile has been going through its own evolutions. Luckily for us we have been there to push that evolution in the direction we want it to go. Everybody remembers the stinky mess when we first turned it. On the second turn it was going well but a bit too hot. We decided to turn it every day to keep things oxygenated. Now on day eight, the sixth turn, it appears our strategy is working, as there are few signs that the pile is ever getting anaerobic. It is uniformly moist and hot. On day two, when we first turned it the heat and moisture were patchy. It is only by turning the pile that we spread out these patches of activity to the rest of the pile. We have been adding one watering can of water to the outside before each turn to keep things moist. We also keep the pile covered with plastic between turns. If we allowed the pile to be exposed to the air it would dry out in no time.
It looks as though we are on track to be finished with this pile in about 10 to 15 more days.
This is with out a doubt our most successful composting effort. It has been a fairly intensive job, but it will be worth all of the good soil biology in the end.

Thursday, April 17, 2008

5th day of compost


5th day of compost
Originally uploaded by tlbaraka
We turned the compost for a second time on the afternoon of the 16th. We where a bit worried about what we might find, as it was so stinky on the first turn. We where happy to find that the compost was quite hot. It actually produced steam in 40 degree weather. It did not have much smell either. One part was a bit stinky, because it was too dry and not decomposing properly, we added a bit more water here. In fact the pile is composting a bit too quickly now. Notice the white residue in the middle of the picture. This indicates the presence of anaerobic bacteria, meaning the pile is using more oxygen than is present. If we do not address this problem the final product will be low quality. We are working to maximize the amount of aerobic life in the pile not anaerobic.
It is likely that the nitrogen ratio of the pile is a little bit high. As a first measure, the pile will be turned everyday. Hopeful turning the pile everyday will bring more oxygen into the system and fix the problem. If this does not work we may need to add a sparing amount of high carbon material such as shredded paper or cardboard. The addition of more material is a last resort. Adding more material after the composting process has started will increase the amount of time required to finish the pile off.

Monday, April 14, 2008

The pile on April 14th


The pile on April 14th
Originally uploaded by tlbaraka
Looking good on the outside and showing signs of internal heat, we made the choice to turn the pile after only two days. It might have been a better idea to turn it after four. On the inside the pile was only just starting to heat up. Once we got into the middle things weren't really happening yet and it was all a bit stinky. It was also quite dry so we really needed to add water. It is likely that we will need to add water on the next couple of turns before we get it right. This is really only the fifth or sixth pile that we have made, it will probable take a few dozen more before we really get it right.

Day one: Assembling the elements


A close up of the ingredients
Originally uploaded by tlbaraka
This is the first post of series that will be published over the next few weeks. If all goes well it should be approximately 18 days long. If we have not been that good it could take much longer. On April 12 we assembled a compost pile in the front yard of our residence in Jordan.  It would be difficult to list all of the different materials that went into the building of the pile, because we don't really know ourselves. The rule of thumb - "If it was alive once, it can be composted". We do know that banana leaves, mesquite leaves, goat manure, dried up old bread, sheep's wool, guava leaves, wood ash, chicken poop, sticks and stones, kitchen scraps, snails and bugs went in. It is likely that some plastic made its way into the pile as well, this will be removed as it goes. We hope that countless species of microscopic life made it in as well. It is the diversity of the life in a finished compost that makes it so valuable to a garden. It is the flourishing of microscopic life that we are trying to encourage by assembling a compost. All of the fungi and bacteria found in a good finished compost are around us at all times. When building a compost we bring the elements together and allow life to do the rest.                                  


Watering the pile
Originally uploaded by tlbaraka
Water is the "keystone" element of any compost pile, as it is the keystone element of any life system. Life uses water to conduct its interactions. It is the interactions in a compost pile that we wish to encourage. A lot of water is used to start a compost pile, as most of the materials are usually quite dry. A healthy pile will have moisture content of about 50%. This might seem a wasteful use of resources in a region such as the Jordan valley. However, the value of compost in a garden can be seen within a few months. This compost pile will also be used at the project site to help build soil biology around trees that will be planted in the coming weeks.

We are following a composting technique known as the “Berkley Method.” It is a labour intensive method, but it can yield a reasonable product in short period of time. If all is going well we will be making the first turn on April 16th and every second day to follow until the compost is relatively cool and finished. The plan is to blog a picture and some observation at every turn.

Right now the pile is covered with a plastic sheet and holding its moisture so things are looking good thus far.

Monday, April 7, 2008

One Month in Jordan


The Land
Originally uploaded by tlbaraka
When it comes to water, Jordan is one of the poorest countries on the planet, consuming an average of only 200m3 /person/year. The global average is approximately 7,700 m3 and the North American average is on the order of 110,000 m3 .

Al Jufah is located in the Dead Sea Valley several hundred meters below sea level. The average rainfall for the area is 100-150mm per year which usually falls in just one or two rain events. The summer temperature often exceeds 40°C and the defining characteristic of this bioregion, as with all arid regions, is an average evaporation exceeding precipitation. Water is a major issue for the region, and water harvesting design will be vital to success under these conditions.

During a visit to Jordan in Late 2007 Nadia, Abu Yahai, Lawton designed and implemented three on-contour rock walls (swale walls) on the site, one of which can be seen in the photo above. The walls were back filled and covered with a layer of topsoil.

Rock Wall October 2007
Originally uploaded by tlbaraka
These walls will function as soakage water harvesting features and planting sites. Other site infrastructure includes a gravity fed drip irrigation system, small holding tank, low perimeter fence and a small concrete block structure.

The long-term goals of PRI Jordan are to establish sustainable arid land living systems, which can be affordably replicated by members of the local community. The primary short term objective for the coming months will be planting and maintaining perennial plant systems along all three swale walls and fence lines. These guilds will included both support and crop species. Plantings regimes will resemble those established by Geoff during Greening the desert, 2001. In the future these perennial systems will provide micro-climatic stability on the site, giving shade and wind protection, holding soil moisture and building organic matter. As the system develops the site will become a more comfortable living environment for human habitation.

All plantings will need to be in the ground by the end of April, as the weather is too hot and dry after this time. Through the course of the summer months it will be crucial to keep the plants irrigated and well mulched to survive the season. The summer construction of a straw bale house may take place if more funding for the project can be sourced.

Raising local awareness and empowerment will be the most important aspect of PRI Jordan. It is important to demonstrate practical solutions for local difficulties involving water, food (nutrition), fuel, housing and waste management. Empowerment of the local population is vital to the maintenance of local stability and sustainable long-term success of any community. There is a strong historical presence of efficient water use and water harvesting design throughout the region. The Nabetean culture was second to none when it comes to dry land agricultural design and many aspects of permaculture design take a page directly out of this cultural history.

It is the hope of PRI Jordan to rekindle the success of these traditional systems, reducing the dependence on modernization and industrialized systems.

Sunday, December 16, 2007

Farm Life


Freddy the Fab Fence Maker
Originally uploaded by tlbaraka
As always, we are busy and made more pressed for time with a four day Christmas vacation coming quick. We could just stick around the farm and keep working, but we are getting a little worn out. Time for the beach!
There are many different projects going, at various stages of development. The following is a run down of some of what we've done within the last month.

Our Captain Mr. Freddy the fencer headed the fence project up. It took a while to complete as none of us had ever built a rabbit and roo proof fence. Is there such a thing??? A combination of home milled, courtesy of Fred, and locally milled wood was used in construction. It would have been ideal to use only home milled wood but this was not possible, as time and effort is spread out amongst several different projects on any given day. If the time had been taken to home mill the entire fence it would have taken far too long to erect, and the garden would soon become Le plat du jour for roo and rabbit alike.

In November Owen, a friend of Jesse and Freddy from California, showed up to lend a hand for a couple weeks. It made all the difference in the world to have an extra pair of hands around. An added bonus was a fresh face offering tons of encouragement and support. It takes a very special person to put up with Jesse and I and we give much thanks to Owen and his fantastic attitude. Get Crackin!!!


Gravel pad for garden access
Originally uploaded by tlbaraka
The garden area expanded a bit to include a gravel pad that will give access to farm vehicles. This area will be the multi use working space for washing up veggie's and any other activities involved in gardening and harvest. This was another 'wheelbarrow project' involving lots of hard work spread out over several days. The whole garden area is very large. In the coming months many hours will be dedicated to refining the system and planning for the future.

It is commonly suggested that diakon radish and mustard are both excellent cover crops to repair damaged soils and building soil structure. An added benefit is the ability of the plant flowers to attract beneficial insects into the garden. These plants have both been broadcast seeded throughout several systems on the farm site as well as being trialed in these two plots.


Daikon and Mustard going well
Originally uploaded by tlbaraka

These two plants have worked very well under various conditions and soil types. They both exhibit great germination rates and vigorous growth giving good soil coverage. Several species of beneficial insects have been observed on and around these plants. Weather was a huge factor for us too. Nothing seems to replace that natural rain that comes down nearly daily on the farm. In fact, just today a thick fog rolled in followed shortly by rain.


Owen building a spillway
Originally uploaded by tlbaraka
In mid November 760 tree seedlings arrived at the farm and planting became priority. These trees were a free subsidy from the local land care group and all are hardy native species several of which produce very useful timber wood. Most of the trees were planted as wind breaks. This is Owen helping us prepare a windbreak composed of 33 individual swale mounds down the length of a treeless ridge. At this point in time Martina, from Italy, had just arrived which was great, as the job of planting these trees is challenging. It was really nice to have everyone planting trees and four countries being represented all learning a bit about Permaculture. We were busy with planting for a long time and still have some to do. A total of 48 swales were constructed and there are about 150 trees left over.


Windbreak
Originally uploaded by tlbaraka
This is one of the main windbreaks where we planted a combination of trees and shrubs. We received Acacia melanoxylon, Grevillea robusta, Lophostemon confertus ,which are all great timber trees, with several varieties of Eucalyptus. Tagastase and Pigeon Pea have been interplanted and of course a mix of herbaceous cover crop, which is coming up nicely.


A little rain.....82mm
Originally uploaded by tlbaraka
For the last month rain has become common and Jesse and I feel right at home, being from Vancouver and all. One morning the rain gauge registered 82mm over night, a real cracker!!!

The swale filled up with water that morning. The swales are working very well with no damage since the 70mm event a while back. The timing of the rain could not have been more perfect with most of the trees in the ground and a garden planted.

Thursday, November 15, 2007

Legumes


Universe in a raindrop
Originally uploaded by tlbaraka
The rainy season has started with one big event this year and 70mm of rain came down in a couple of hours. You can see the power of water flow over the land here when you get so much water at one time.
I attempted to get a picture the rain and this is what I ended up with. Not really what I wanted to show but you get the idea.


Roots of a vetch plant
Originally uploaded by tlbaraka
This rainfall was very much appreciated because of the recent seeding and a heap of trees to be planted in the near future. The swale and the garden are now fully charged with moisture and will be good for the next couple of weeks until it rains again. In fact it was a bit too much rain for the swale and it broke the wall in one weak spot where not as much soil was avalible. No big deal just a 30-minute patch job with shovels and it was back to normal.
All of the seeds were legumes sown as a cover crop after the land had been disturbed by machinery in the garden, on the swale and the area surrounding the house site. This land has had cattle on it for many years and most of the soil is depleted of nutrient and badly compacted. The cover crop will help to fix nitrogen in the soil, break up the compaction with deep roots; crowd out uninvited plants (“weeds”) in favor of our own dynamic accumulators; and act as a living mulch to maintain soil moisture and biology.


Perennial garden
Originally uploaded by tlbaraka
Fortunately there is an abundance of dam water irrigation and some areas didn’t have to wait for the rain. Though, the seeds never really started to go until the big rain. Something special is carried on the clouds.


Our mix
Originally uploaded by tlbaraka
The seed was sown by hand ‘broadcast style’ and was either raked in, as on the swale, or mulched with cane straw, as in the garden. Mulching is the preferred technique, however it is relatively expensive making it impractical for a large area like the swale.


Covercrop coming up in garden
Originally uploaded by tlbaraka
This is a before and after shot of the garden. The after shot shows the garden with about 3 weeks worth of growth on it. Once the fence is up around the garden will can start planting veggies until then the cover crop will be allowed to do its job. This season’s veggie crop maybe a little behind. No worries though, time building soil is never wasted time!


Vetch, Lupin, Pea
Originally uploaded by tlbaraka

Friday, November 2, 2007

Garden Construction

It is one thing to grow a small veggy patch out the front door of a rental house add a bit of mulch, some manure, a few plants, seeds, water and enjoy. The evolution of a large permanent garden is a whole other exercise in muscles, machines (if you have them), planning and time. The garden at the Rivertree homestead is located approximately six meters to the down slope side of the swale( that was established several weeks ago). The hope is that the garden will benefit from being on the down slope of the swale. This is an account of the design and implementation of the Rivertree veggy garden.

Garden location
Originally uploaded by tlbaraka

The line of string on the right indicates the placement of a future fence to keep out the local rabbit and Kangaroo/Wallaby population. Using a laser level it is pegged to the natural contour of the land the remainder of the garden was designed square to this line. The garden covers an area of approximately 240 square meters, of which 70 are dedicated to pathways.


Lining up pathways
Originally uploaded by tlbaraka
First, a string was placed to mark the edges of a pathway. In the proccess of this type of garden construction, material is removed from between the two lines and placed on either side to form the raised beds. Second, there is an application of blood and bone meal fertilizer that provides a young garden with vital nutrients and helps kick start soil biology. It is applied before the beds are dug, and is incorported as the digging takes place.


Tools of the trade
Originally uploaded by tlbaraka
These tools would find themselves permanently glued to our hands for many days. We did use the excavator to do the bulky rough work, but the majority of the effort was spent on more deatailed work that only hand tools could do. When we started, Jesse and I did not fully realize how much we were in for physically.


Jesse digging paths
Originally uploaded by tlbaraka
The initial dig, with the excavator, is to an average depth of .5m. On either side of the trench the beds begin to form with the excess material. As with most water efficient design, it is important to keep pathways and beds dead level. We should have been checking the trench for level as we went along but we didn't. The paths were dug to a consistent average depth, but they were not marked on contour and therefore it produced a 20cm difference in elevation from one end of the garden to the other. With that much elevation change in the pathways water will collect at the low end creating a soggy area and at the high end the garden beds would be dry making it difficult to water consitently. Obviously this was a really big mistake and by the time we had noticed all the trenches had been dug.


Leveling off and measuring path
Originally uploaded by tlbaraka
We have a bit of a melt down at this point, because we have recognized our mistake and we are already very tired. In order to correct the problem we had to move around a lot of extra material by hand meaning the lessons of this experience will not soon be forgotten.


Tip
Originally uploaded by tlbaraka
To lift our spirits we went to the Tip and did some garbage picking. Notice the giant bird net in the background. We were on a hunt for cardboard and other resources to be rescued from the Tip and used to help create a bountiful garden.


Our haul
Originally uploaded by tlbaraka
This is the first time in our lives we went home from the garbage dump with more than when we arrived.


Crushed limestone
Originally uploaded by tlbaraka
In the distance rests 30 cubic meters of crushed limestone. Behind the photographer is the garden for which it was destine.


Gravel and cardboard
Originally uploaded by tlbaraka
The paths were lined with a thick layer of cardboard and filled with the crushed limestone hauled wheelbarrow by wheelbarrow up the hill. The gravel filled pathways will function as both drainage and water catchment systems. In theory, these beds will be both moist and well drained using this pathway design.


Path construction
Originally uploaded by tlbaraka
As the pathways were filled, a width of .80m was maintained using a measured length of wood, and the laser was used to ensure that dead level was maintained.


Soil over cardboard
Originally uploaded by tlbaraka
The cardboard is used as a biodegradable weed barrier at the edge of the garden pathways. Persistent weed problems always occur at the edges, like the base of a fence post or crack in the sidewalk. The buried cardboard will prevent weeds for several weeks, but not permanently. It is important to plant something in this part of the bed soon. Pennyroyal is a favorite for its pleasing smell and ability to distract pests.


Finished
Originally uploaded by tlbaraka
There it is!!! The completed garden. We are very happy with our effort and persistence and the garden is going to be very productive in the future. All we need now is a few thousand plants!

Tuesday, October 23, 2007

Where some of our food comes from

For the past few weeks, here at Rivertree, Jesse and I have been working really hard on puttting in part of a permanent food production system (big garden) that has taken much of our energy. During this process, which is near completion, we have had lots of opportunities to practice skills in growing and catching our own food. It can be a bit of work ,in the begining, learning how to eat really well but for us there is no better feeling than knowing where our food comes from. Our dream, is that one day we have an established living system, outside our home, that provides us with all of our most basic needs. For now we settle for whatever we can get.

The following is a summary of our efforts at outsourcing the grocery store in the past weeks. It hasn't been all that much so far but the potatoes are coming along and new veggies are planted everyday. Jesse spends about 4-8 hours a week in the garden which, he claims it's the best part of his day.

WARNING FOR PEOPLE WHO DON'T EAT ANY MEAT THERE ARE PICTURES OF BUTCHERING.


Originally uploaded by tlbaraka
Jesse's first rabbit caught using a wire trap that goes over the head when they come out of the hole. They are a many, and we like to eat meat so it is a useful experience in learning to catch them. As a young boy Jesse's Grandfather taught him catch gofers using a wire trap. The wire trap is a low cost low effort technology and a dozen traps can be set in less than half an hour. With a quick check a couple times a day there are no guns and no sitting and waiting.


seasoned and ready for the oven
Originally uploaded by tlbaraka
The rabbit turned out really well. It was totally free tasty and healthy. We have not tried to catch another since, as we have had a freezer full of kangaroo meat.


Originally uploaded by tlbaraka
One morning while Jesse and Freddy were driving home they hit a Roo or Walabee?? We call him a Roo. You really have to pay attention out here when you drive because the Roos cross the road in front of you very suddenly. Usually it is impossible or dangerous to stop. Most people have a large bar across the front of the vehicle in order to deal with this situation and it is very common where we are to see dead Roos on he side of the road because sometimes they are really big.

The Roo was still alive with both or one of the legs broken. Jesse did the best he could to bring the animal to peace quickly. Leaving Roo on the side of the road to rot was not an option (although you drive by a lot of that) because he was not too banged up so definitely edible. This is Jesse and Fredrik tying up Roo, like we had seen in pictures on the net.


Skinning/Gutting
Originally uploaded by tlbaraka
It is what it is...skinnig and gutting. They are doing the best they can, because neither has worked with a large carcass before. They mention that having the experience with the rabbit, also a first, helped. Baby steps!!!


Gutting
Originally uploaded by tlbaraka
Figuring out where or how to take the guts out was interesting....but it all fell out in the end. I think at this point they were trying not to hit the bladder. This was really hard to watch. however, it was really important to participate as much as I was capable. Having this intimate connection with my future food was a new and difficult experience for me but I feel lucky to have had an opportunity to learn.


Butchering
Originally uploaded by tlbaraka
Jesse and Freddy trying to work it all out and I am on the sidelines with a piece of paper from the interent helping them find the different cuts on the carcass. In the end they improvised.


Good Cuts
Originally uploaded by tlbaraka
We were not sure how to butcher up the meat and the directions from the internet weren't really helping out so Freddy and Jesse cut what they thought was edible nice undamaged meat. We all thought it looked like stuff we had seen at one point in life and then we proceeded to wash and freeze it. We covered all the meat in olive oil and lemon juice then packaged for use in future meals. The meat was still really warm when I was handling it and I felt a little strange about it. I also felt pretty excited when I thought about how healthy and beautiful the meat looked. This meat has given us great tasty dinners such as two very good stews, tacos, sheppards pie, steaks and given much to cutting meat costs. We find it is best in a stew or simmered for a while for flavor and tenderness.


Dinner
Originally uploaded by tlbaraka
This is all the meat together before we separated it and it is quite a bit of food. We have not hit a Roo since and definitely work to avoid it, but if it happens again this is what we will do. It was really hard the first time, because we had no previous experience.


This is the garden at the front of the house we are living in, it is only a temporary living quarters, as we wait for the house on the land to be completed. When we arrived, the garden was mosty "weeds" some lavader bushes and a few agapanthus plants. The soil was a sad sight of decade granite sand. The house at the land was still months from completion and no location had yet been selected for the garden. We could not really say that we where pursuing permaculture without a veggi garden. We planned to make this little dust hole into our garden straight away. Jesse has done a couple gardens in the past and I have had little experience with any and this looked like a real challenge. Nothing like the rich black soils of the Fraser Valley.


Jesse did a fantastic job in coverting our dry little sandy space into a productive plethora of greens to eat. It is challenging with, little water and basically sand as your soil. Heavy mulching was required and regular fertilizing with a diluted manure tea. The garden has required a modest level of outside resource, but we need a quick result at this temporary location. He did a really good job and at this point we don't need to buy too many greens. With three people to feed it takes a bit of time and practice to get it right. The price of vegi's is a lot higher here than back home, but the most important thing is that we are getting nutrition not normally found in store bought veggies. We have heard that the sure fire best way to live a long and health life is to eat as much food from your yard as possible.


We put all the food out to give an idea of what we are able to harvest from the garden on a regular basis. It is not an everyday thing but a few times a week we can have a really nice salad with heaps of goodness. This is chard, three types of letucce, beet tops, cabbage and broccoli leaves, dill, basil and sage. Tasty treat!!


Off to catch breakfast
Originally uploaded by tlbaraka
Whenever we have had a couple of days off we have taken the opportunity to go to the coast and do some surf fishing. It is a lot differrent than any kind of fishing we have back home and a bit of relax vacation time from the farm.
Whiting are one of the fish that you can catch at this time of year as well as bream and flatheads. Compared to fish caught commercial offshore these fish are extremly low effort sources of protein. We are told by locals that winter is the main fishing season and we are at the beginnning of spring heading into summer. They are still around but it takes a bit more time, standing on the beach. Well worth the wait though, this morning Jesse caught two Whiting that were as awesome tasting as any we have had. Other than bait and a licence (which are both cheap )you can fish to your hearts content. The only thing you have to look out for is the sun because if you are out there all day it can take its toll.


Just want to highlight the website http://www.pfaf.org/ fantastic resource for some quality info about plants...permaculture perspective of course.